Geometry City Project Planner
Design a city of 3D buildings, see the faces, edges, and vertices of each shape, calculate surface area and volume, and print to-scale nets with glue tabs ready for cutting and folding. All computation runs in your browser.
Add a building
City summary
Faces
0
Curved surfaces
0
Edges
0
Vertices
0
Your city has 0 buildings
Add a building or load an example to start planning your city.
Geometry City Project Guide
What is a Geometry City Project
A geometry city project is a hands-on math assignment. Students build a miniature city out of paper or cardstock, and every building is shaped like a 3D solid, such as a cube, cylinder, or pyramid. The finished city sits on a cardboard base that represents the city plot.
The project turns abstract solid geometry into something students can hold. Along the way, students measure dimensions, identify faces, edges, and vertices, and calculate the surface area and volume of every building they design.
Materials You Need
- Cardstock or heavy paper. Holds a fold better than regular printer paper.
- Scissors or a craft knife. For cutting along the solid outer edges of each net.
- Glue stick or white glue. For attaching the gray tabs.
- Ruler. For checking that printed dimensions match the plan.
- Cardboard or poster board base. Represents the city plot the buildings sit on.
- Markers, paint, or colored paper. Optional, for decorating finished buildings.
Step by Step
- Choose a plot size and add buildings above, or load one of the example cities to start faster.
- Set each building's shape, dimensions, name, and color in the planner.
- Print the net for one building at a time, or use "Print all nets" for the whole city.
- Cut out each net along its solid outer lines.
- Fold every dashed line, then glue the gray tabs to close up the solid.
- Arrange the finished buildings on your cardboard base to match your planned city layout.
3D Shape Reference
| Shape | Faces | Edges | Vertices | Surface area formula | Volume formula |
|---|---|---|---|---|---|
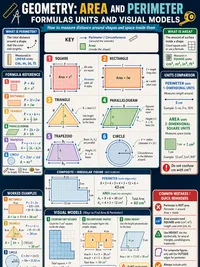
| Cube | 6 | 12 | 8 | SA = 6s² | V = s³ |
| Rectangular Prism | 6 | 12 | 8 | SA = 2(lw + lh + wh) | V = l × w × h |
| Cylinder | 2 flat + 1 curved | 2 | 0 | SA = 2πr² + 2πrh | V = πr²h |
| Cone | 1 flat + 1 curved | 1 | 1 | SA = πr² + πrl, where l = √(r² + h²) | V = ⅓πr²h |
| Square Pyramid | 5 | 8 | 5 | SA = a² + 2al, where l is the slant height | V = ⅓a²h |
| Triangular Prism | 5 | 9 | 6 | SA = (√3/2)a² + 3aL | V = (√3/4)a²L |
Triangular prism formulas assume an equilateral triangle base with side a and prism length L. Cylinder and cone are counted with one flat face for every flat circle plus one curved surface, matching the planner above.
How to Use the Printable Nets
Each printable net is drawn to true scale, so a building set to 5 cm tall in the planner prints as a net that folds into a 5 cm tall solid.
- Cut along the solid outer outline of every face.
- Fold along every dashed line, creasing firmly with a ruler edge.
- Glue the light gray tabs underneath the matching edge to close the solid.
- Let the glue dry flat before standing the building up.
Grading Rubric
| Criterion | What to check |
|---|---|
| Shape variety | The city uses at least three different 3D solids. |
| Measurement accuracy | Built dimensions match the planned dimensions. |
| Math work | Faces, edges, vertices, surface area, and volume are recorded for every building. |
| Construction quality | Folds are crisp, tabs are glued flat, and the city stands on its base. |
Tips and Common Mistakes
- Skipping the crease. Fold each dashed line against a ruler before gluing, or the tab will not sit flat.
- Gluing the wrong tab. Match each tab to the edge right next to it before adding glue.
- Confusing surface area with volume. Surface area covers the outside of a building, volume fills the inside.
- Using slant height instead of vertical height. Cones and pyramids need the slant height for surface area, but the vertical height for volume.
- Overcrowding the plot. Check the plot area and each building's footprint before printing, so every building fits on the base.
Frequently Asked Questions
What are some geometry city project ideas
Cubes make city halls or banks, rectangular prisms make offices and towers, cylinders make water towers or silos, cones make trees or roofs, square pyramids make monuments, and triangular prisms make pavilions or bridge supports. The example cities above show three ready-made combinations.
How many shapes do I need for a geometry city project
Most classroom rubrics ask for three to six buildings using at least three different solids. Check your assignment sheet for the exact count, then add that many buildings in the planner.
What grade is the geometry city project for
The project is most common in grades 3 through 6, when students learn faces, edges, vertices, surface area, and volume. Teachers can scale the dimension ranges up or down to match any grade level from late elementary through middle school.
What is the list of 3D shapes I can use
The planner supports six solids, cube, rectangular prism, cylinder, cone, square pyramid, and triangular prism. Together they cover the shapes most elementary and middle school geometry standards require.
Can I share my finished city with a teacher or classmate
Yes. Use the "Copy share link" button in the planner. It saves your full city, including every building's shape, dimensions, and color, in a link anyone can open to see the same plan.