Beam Deflection & Stiffness Lab
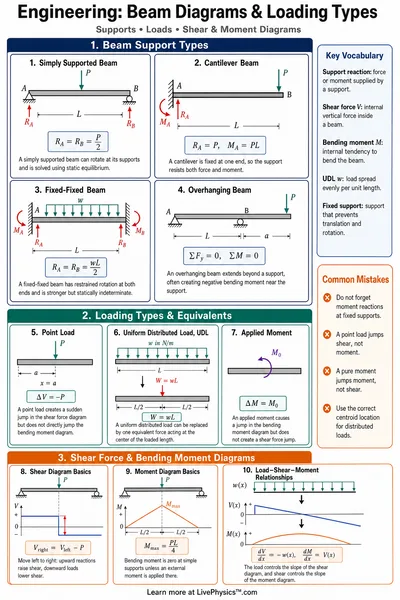
Load a cantilever or a simply supported beam, change its span, its cross section, and its material, and watch how far it sags. The lab reports the maximum deflection, the peak bending stress, and the factor of safety, so you can see why a deeper beam and a stiffer material beat a wider beam every time.
Guided ExperimentDoes a taller beam or a wider beam resist sagging more?
If you can add the same amount of material, do you predict that making the beam taller or wider will reduce its deflection more? Why?
Write your hypothesis in the Lab Report panel, then click Next.
Side view and deflected shape
Controls
Height matters far more than width. Stiffness grows with the cube of height.
Results
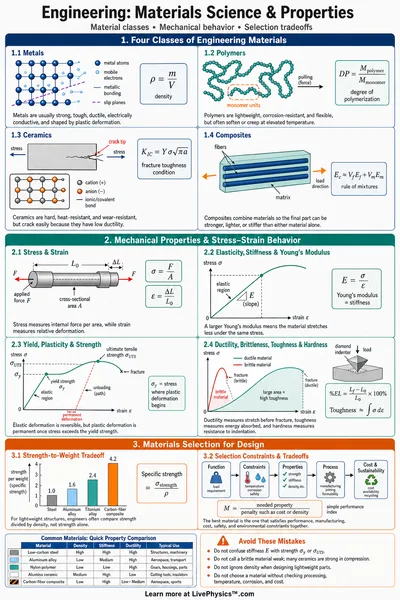
| Material | E (GPa) | Deflection (mm) | FoS |
|---|---|---|---|
| Structural steelstiffest | 200 | 0.20 | 83.3 |
| Titanium | 116 | 0.34 | 293.3 |
| Aluminum | 69 | 0.58 | 31.7 |
| Reinforced concrete | 30 | 1.33 | 6.7 |
| Oak wood | 11 | 3.64 | 13.3 |
| Section b × h (mm) | I (×10⁻⁸ m⁴) | Deflection (mm) |
|---|---|---|
| 100 × 200 | 6666.67 | 0.20 |
| 200 × 200 | 13333.33 | 0.10 |
| 100 × 400stiffest | 53333.33 | 0.02 |
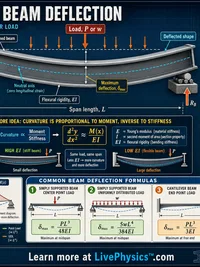
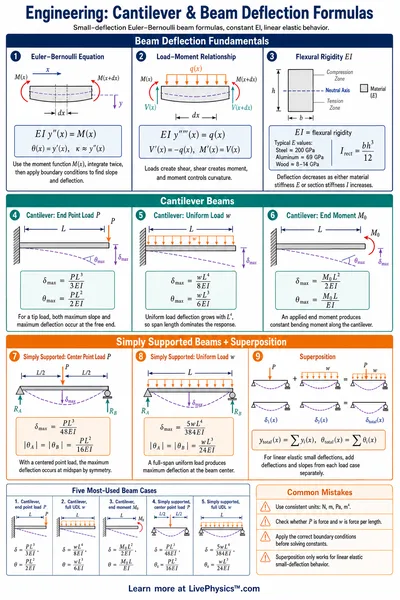
Deflection grows with the span raised to the third power for a point load and the fourth power for a distributed load. It falls when the material is stiffer (higher E) and it drops very sharply when the beam is taller, because the second moment of area I grows with the cube of the height. Going taller beats going wider every time.
Data Table
(0 rows)| # | Beam type | Load type | Span(m) | Section (b x h mm) | Material | Deflection(mm) | Factor of safety |
|---|
Reference Guide
What E and I Mean
Euler-Bernoulli beam theory predicts how much a beam bends. The deflection depends on the load, the span, the Young's modulus E of the material, and the second moment of area I of the cross section.
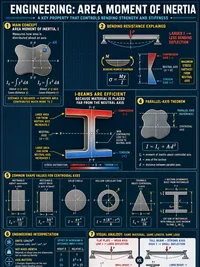
E measures how stiff the material is, so steel resists bending far more than wood. I measures how the material is arranged around the bending axis. The product E times I is the bending stiffness, and a bigger product means less sag.
Why Height Beats Width
For a rectangular beam, the second moment of area depends on the width once but on the height cubed. That is why depth is the most powerful way to add stiffness.
Doubling the width halves the sag, but doubling the height cuts the sag to about an eighth. This is why floor joists stand on their narrow edge and why steel I-beams put most of their material in the top and bottom flanges, far from the bending axis.
Cantilever vs Simply Supported
A cantilever is fixed at one end and free at the other, like a diving board. A simply supported beam is pinned at both ends, like a plank across two trestles. The support condition changes the sag dramatically.
Under the same point load and span, a cantilever sags about sixteen times more than a simply supported beam loaded at its center. Adding a second support, or shortening the span, is one of the most effective ways to stiffen a structure.
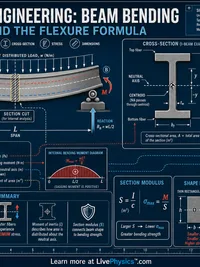
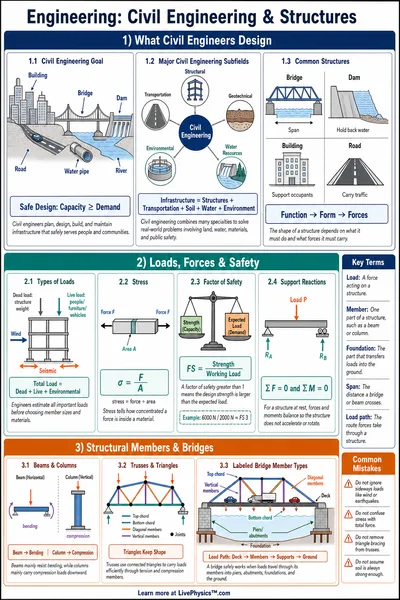
The lab also checks strength. It computes the peak bending stress from the flexure formula and divides the material yield strength by that stress to give a factor of safety. A value at or above about 1.5 is treated as safe against yielding.